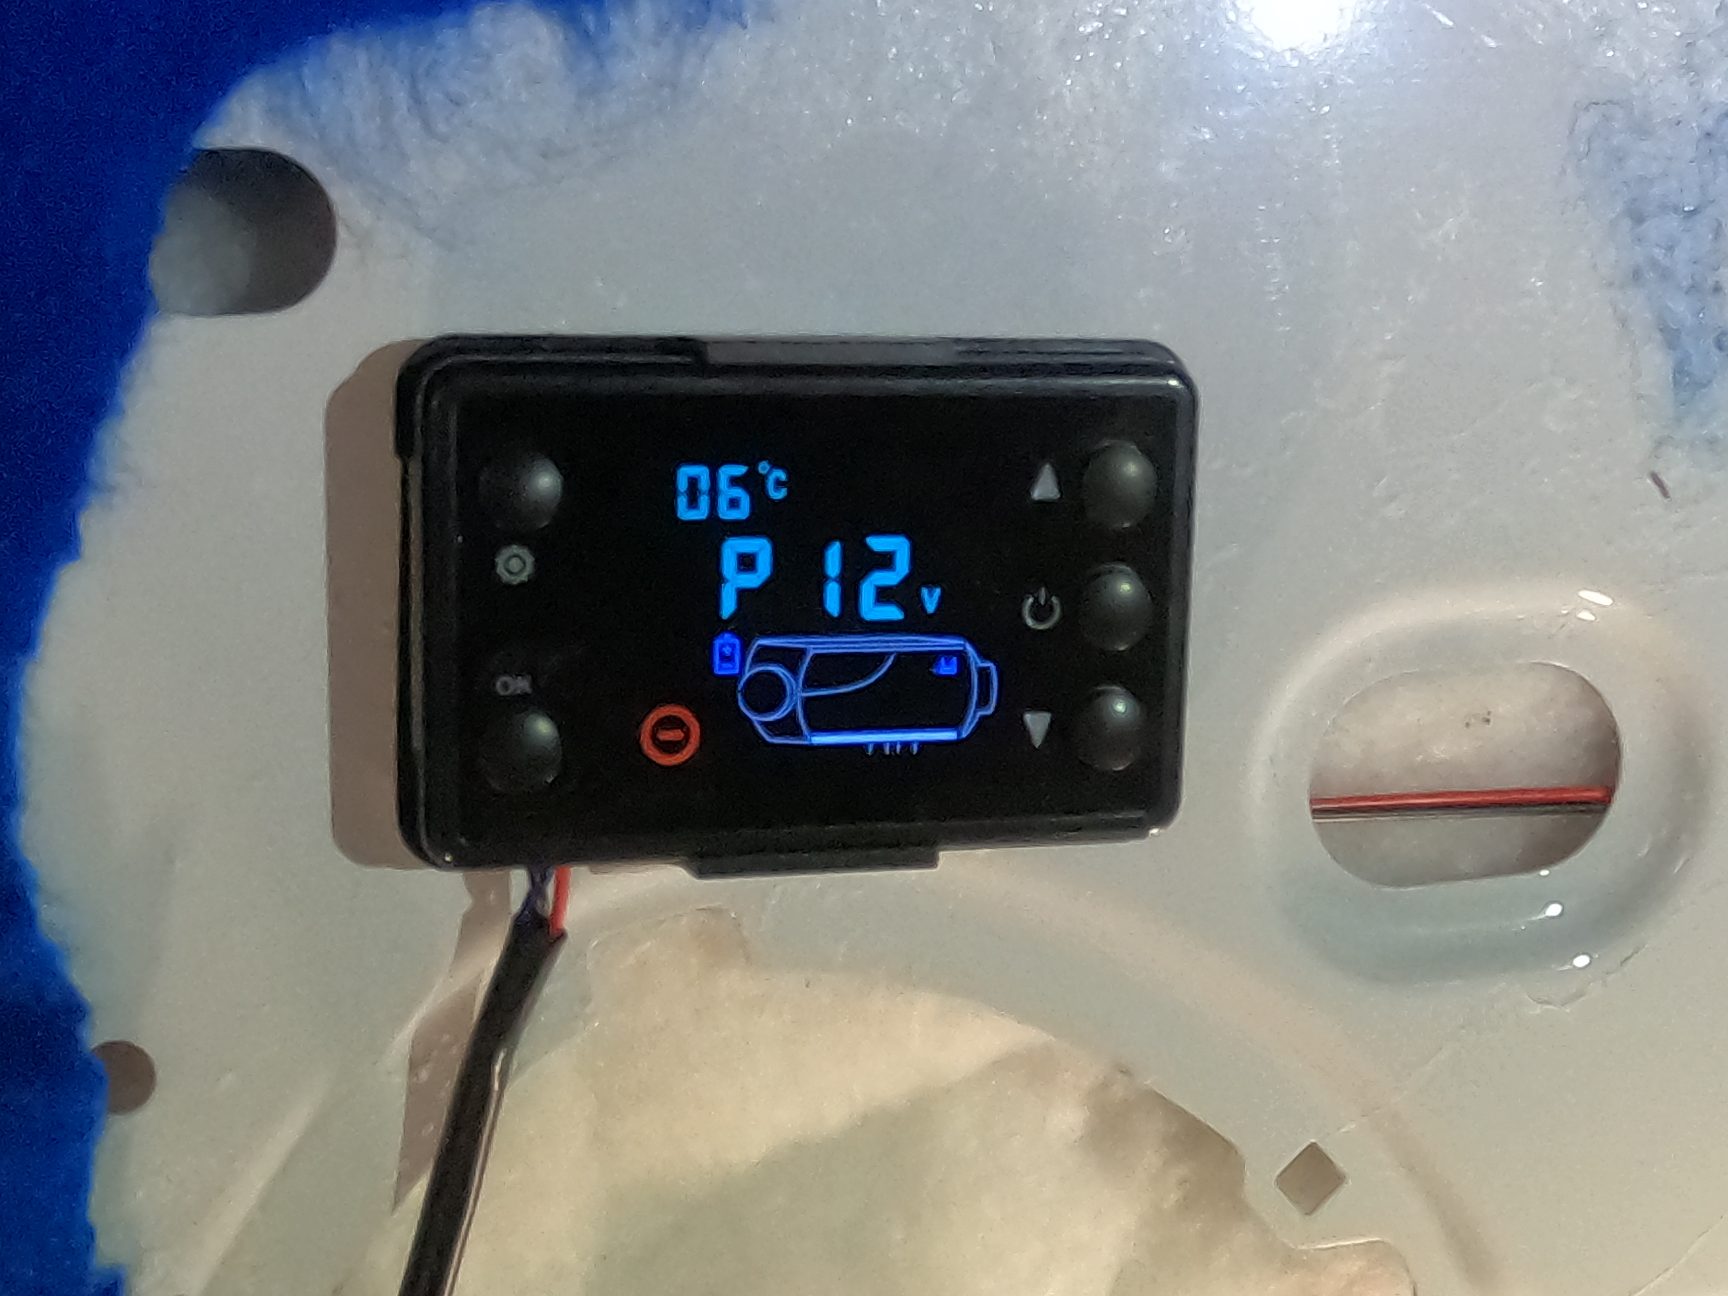
Chinese Diesel Heater Controller

Hello, You have probably found this video if like me, you have recently purchased a diesel heater and realised when you came to fire it up that the controller differs from all the guides online. Don’t panic, I will go through all the features and get you up and running as quickly as I can.
Check my video out on YouTube here: https://youtu.be/FaO68IhYMp0
Introduction
This alternative type of controller can not be swapped for the other, more common type as it uses a different ECU. You can identify this controller because although it looks identical on the outside, the display will be distinctively different once it is powered up.
Instead of a Wifi icon, you will see the current ambient temperature. A stop sign in the lower left corner and several other differences.
As you can see in this video, my van is still a work in progress and has had panels removed to fit new parts for the coming year.
Priming
Priming the fuel pump may be even easier on this controller to the more common unit. Simply locate the up and down buttons on the right hand side of the screen, press and hold and you will hear the pump start operating after a few seconds.
Release the buttons and a few seconds later the pump will stop. Check where the fuel is along the line and repeat as necessary taking care not to flood the heater unit.
Start Up
To start your heater, locate the power button, right hand side in the middle and hold it down until the fan icon starts spinning, the glow plug icon lights up and the power bars light up inside the heater. You should also see lights flash alternately in the inlet & exhaust on the screen.
A short while later the fuel pump icon should light up and you will hear the pump start working. Not long after this the heater should ignite and you can hear it start running.
The heater will normally start in Manual mode, displaying H3 on the screen but you can switch it into Auto Mode. In either mode you can adjust the temperature using the up and down arrow buttons on the right hand side.
Shut Down
Shutting the heater down is exactly the same as turning it on. Locate that power button and hold it until the word “OFF” is displayed. The heater will continue running for a while with the fuel pump off, the glow plug and fans will remain on to burn off any fuel and cool the unit down.
Alpine Mode
Alpine mode allows you to reduce the amount of fuel used to compensate for thinner air at higher altitude. To turn on Alpine mode, simply locate the Settings and OK buttons on the left hand side of the unit and hold them down until a mountain icon appears at the top. Turning this mode off is the same as turning it on. Press and hold the Settings and OK buttons and the mountain will vanish. Take that David Copperfield !
Auto Mode
Switch between auto and manual modes simply by holding down the settings button on the top left of the controller.
In Manual mode you will see a set number of bars displayed in the heater on the screen and it should read somewhere between H1 and H6. In Auto Mode the temperature will be displayed in degrees C. I found in a small van like mine, this mode is pointless as the temperature rises to around 25 degrees and continues climbing steadily even with the heater on its lowest setting. However, I did manage to reduce the temperature a little by using Alpine Mode.
Summary
Those are the basic functions of this controller and should get you up and running.
If you found this useful, please hit the like button.
More importantly if you really liked this video then check out my website and support me in making sustainable outdoor clothing and soaps that are awesome for van life.
Thank You for Watching.
Subscribe for more videos about this van build, road trips and other things I do.
-
 Grizzly Wears Men’s Boxer Shorts£15.00
 -
 Grizzly Wears Logo T-Shirt£10.00
 -
 Black Series T-Shirts£19.00
 -
Product on sale
 Yoga Bear Crop HoodieOriginal price was: £18.00.£15.00Current price is: £15.00.
 -
 Men’s Recycled Sports T-Shirts£15.00
 -
Product on sale
 Yoga Bear Crop T-ShirtOriginal price was: £12.00.£10.00Current price is: £10.00.
 -
 Grizzly Bars – Whisky£6.00
 -
 Grizzly Bars – Pirate£6.00
 -
 Grizzly Bars – Energise£6.00


